';
}
else
{
echo "Sorry! You are Blocked from seeing the Ads";
}
?>
Here is our basic step-by-step information to make a pinhole viewer with a cardboard field.
OK, you need to view the Solar or an eclipse, however you don’t have an authorised solar filter on your telescope. Possibly you don’t also have a telescope. No drawback! I’ll wager you’ve a cardboard field. That and some frequent provides will allow you to construct a pinhole viewer that you should utilize to see an eclipse or the Solar.
Simply observe the steps within the captions. Be happy to experiment with the dimensions of the field, whether or not or not you allow the additional cardboard items hooked up, or the pin’s diameter. In truth, in case you’re a intelligent soul, chances are you’ll need to mount the field on a skinny plywood base, which you then can connect to a sturdy digital camera tripod. That means, you received’t have to carry the field whereas observing.
This exercise is nice for college lessons. (I recommend the trainer cuts out the opening.)
This story was first printed in 2016 and has been up to date.
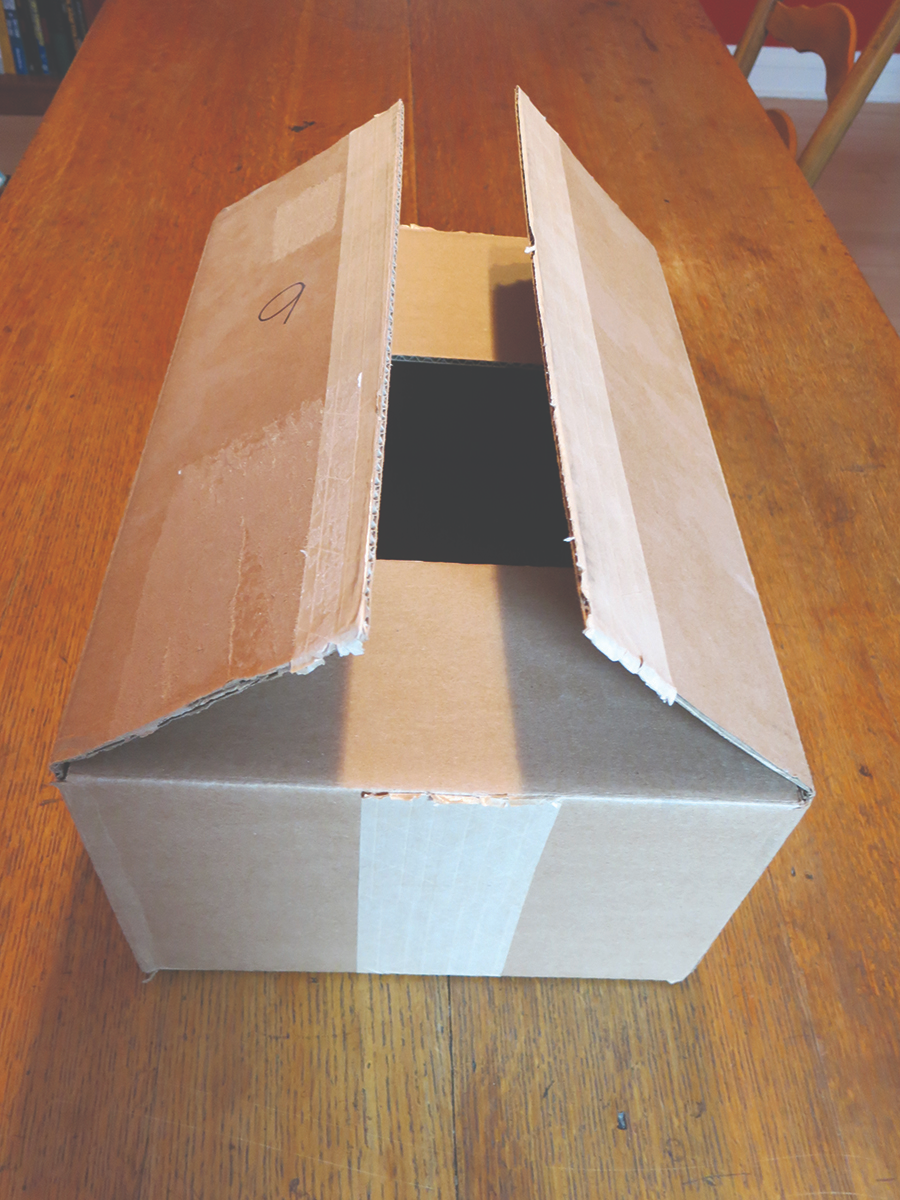
Step 1: Begin with a cardboard field a minimum of 18 inches lengthy. Should you use a field shorter than this, the projected picture of the eclipse or Solar will likely be unacceptably small. All pictures: Michael E. Bakich
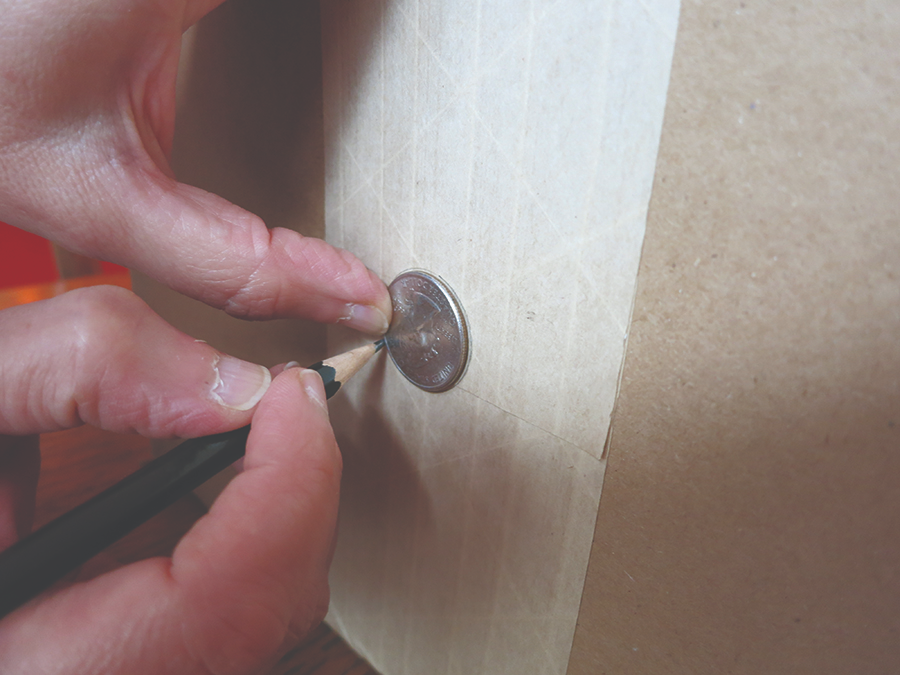
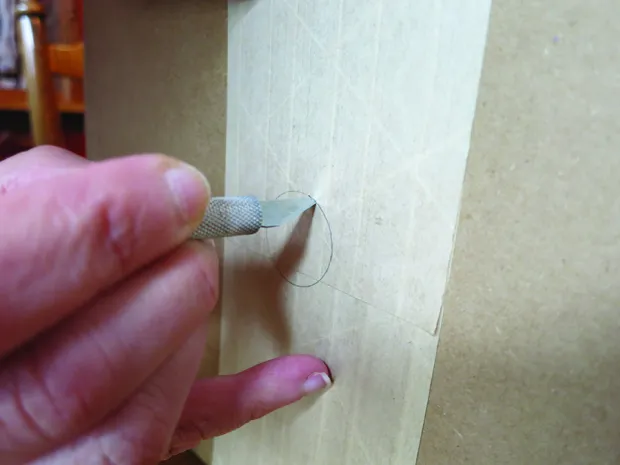
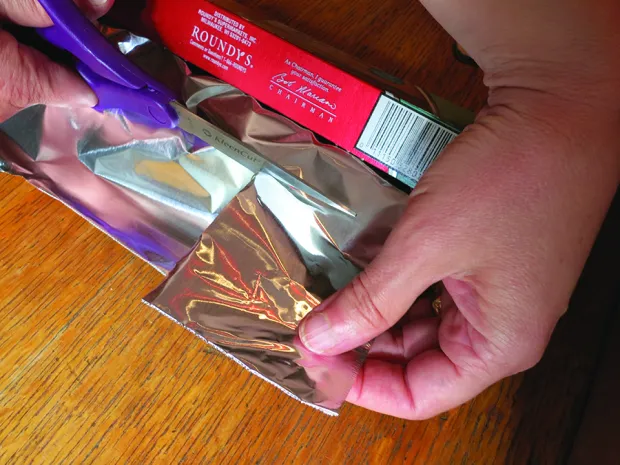
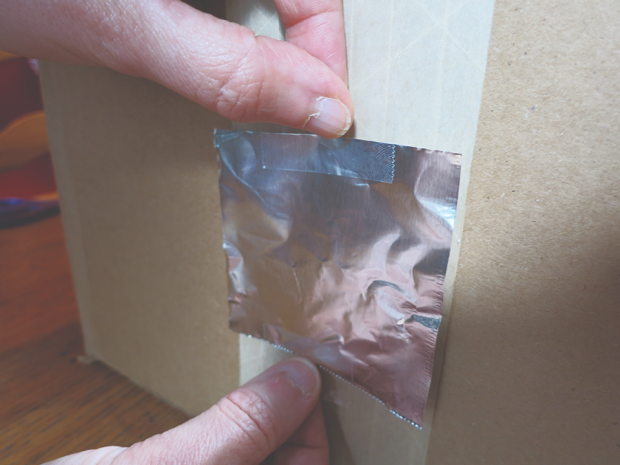
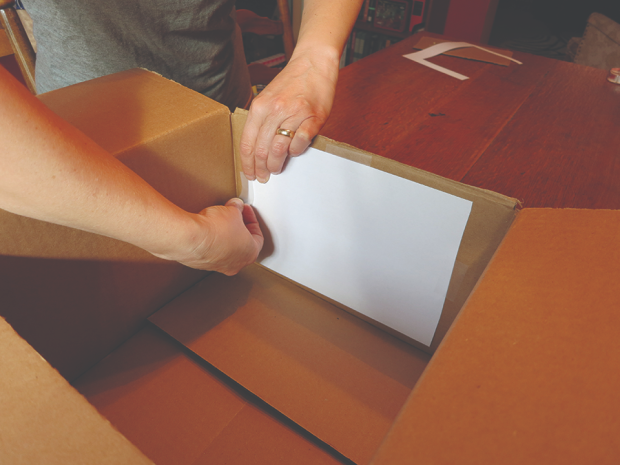
Step 2: On one of many field’s smaller ends, hint a circle through the use of 1 / 4. Step 3: Rigorously minimize out the circle with a pointy knife. Step 4: Observe that the opening doesn’t should be excellent — and even spherical! Step 5: Reduce out a bit of aluminum foil (I used a reasonably thick selection) large enough to cowl the opening within the field.
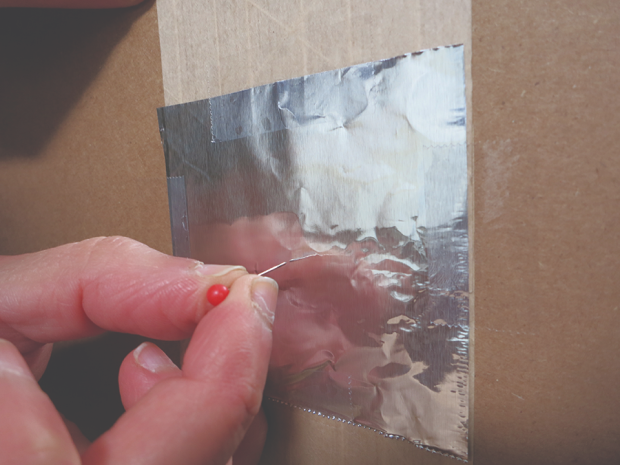
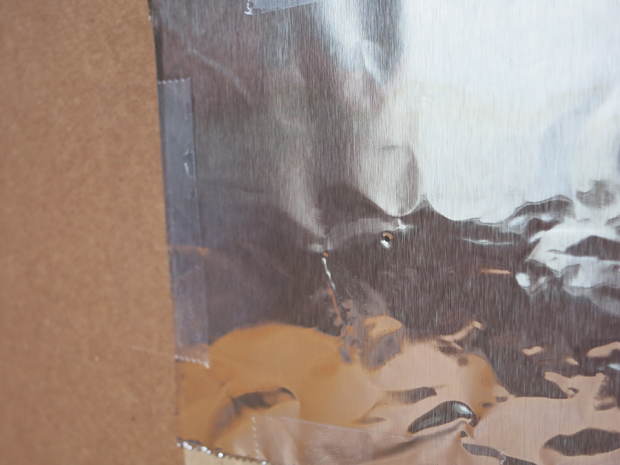
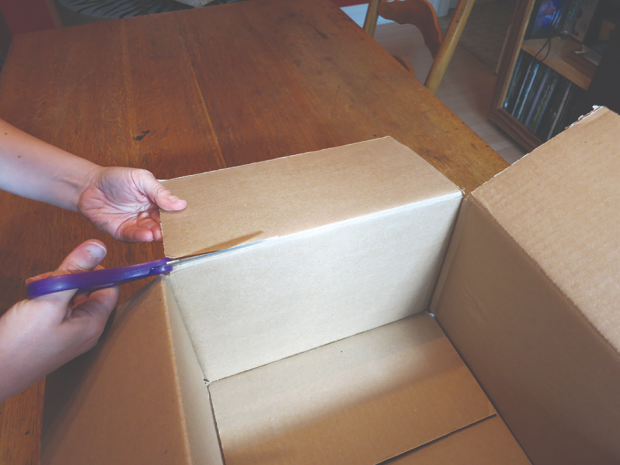
Step 6: Tape the foil over the opening.Step 7: Poke a gap within the foil utilizing a pin. A pin is healthier than most objects you would use since you need a gap with clear (non ragged) edges. As a variation, you possibly can strive utilizing a pointy pencil. That can produce a bigger gap. Cautious, although. In case your gap is just too large, you’ll lose the pinhole digital camera impact and also you’ll simply see an out-of-focus blob.Step 8: Examine the opening for roundness and ensure nothing is obstructing it.Step 9: Reduce away as a lot of the additional cardboard items as you need. Alternatively, you would fold them over and tape them to the field’s sides, making the meeting a bit sturdier.Step 10: Tape a white piece of paper on the within of the field reverse the opening.Step 11: Level the opening on the Solar and observe the projection on the paper. Congratulations!


